Friday, August 1, 2014

The Great Baked Good Debate, UK vs US

The very first week of my internship with the Royal Botanic Gardens, Kew, one of the horticulture students asked me to name one iconic dish from the Southeast United States.  Without missing a step I said, "Biscuits n' gravy."  Blank faces.  Then I was asked twice to confirm that yes, those two words are "biscuit" and "gravy".  The interest in the conversation increased.  I was quizzed about the gravy and whether it means the same thing in Tennessee as it does in London.  When I described the gravy as made from sausage grease, flour, milk and pepper, curiosity turned into open disgust.  I didn't understand. 

Just look at this and tell me that it's not a cookie.
That looks nothing like a proper biscuit!
That week I picked up some McVitie's Digestive Biscuits for my first "British treat of the week".  I basically inhaled the package without pausing to wonder why the word "biscuit" was on a package of cookies.  

It was another week or so before someone explained that biscuits in the UK are completely different from the ones I grew up with.  That opened a whole Pandora's box, and made everyone involved question, not only what culinary qualities constitute a biscuit versus a cookie, but also in defining scones, crackers and cakes.  I expected some cultural differences, but this was a bit more than I had anticipated.  I mean, these folks actually thought that I ate cookies with sausage gravy.

American Biscuits n' Gravy
Last week, I brought in some fresh, homemade sausage biscuits and gravy before a hardy display section meeting.  The biscuits were so-so because people use different metrics for baking here (weight vs. volume), and I didn't think to pack any measuring cups.  They were warm, buttery, and okay overall.  There was only one biscuit left over, and when I threw the sad thing away at afternoon tea it was as hard as a hockey puck.  

The gravy was definitely the finest sausage gravy I've ever made.  Good flavor, color, consistency.  I had worried at first that nobody would eat it if it went gray and unappetizing.  Thankfully it was a nice white with bits of sausage and pepper floating around.

People kept calling these biscuits "scones".  No.
It's biscuits n' gravy, not scones n' gravy.
But probably the most popular part of the dish was the sausage patties.  Most of the sausages you see over here are in casings, so several people stopped to ask me what they were eating.  The idea of ground sausage formed into a patty is a bit too foreign for some folks to wrap their heads around.  The sausage was gone first though.

I had also prepared some sausage biscuits.  You know, like the ones you pick up from the McDonald's drive-thru for $1 when you overslept and didn't have time to make breakfast.  One person remarked that it looked like a hamburger, and because it resembles a burger it shouldn't be eaten without "salad" (toppings) and "tomato sauce" (ketchup).

As I was washing the dishes, I overheard a somewhat heated conversation from the dining area.  There were two folks, each with a biscuit, arguing over the pronunciation of scone.  One pronounced it skh-ON (rhymes with John) and the other skh-OWN (rhymes with Joan).  When I took the dish away to wash, one stopped me and verified that I had brought in the food.  When I affirmed, they asked me to clear it up.  "How do you pronounce the name of this? Skh-ON or skh-OWN?"  I paused, then replied, "Neither.  These are biscuits."  One kind of rolled their eyes, the other scoffed and threw up their hands, and as they walked away I think I heard someone mutter something about Americans.

But is a scone a biscuit?
UT students argue that scones are not equivalent
to biscuits.  Rather, scones are a type of biscuit.
When the University of Tennessee's Glorious Gardens of England mini-term group came to visit, I picked up some scones for the students to enjoy on the bus ride from Kew to Hampton Court Palace.  I also packed some clotted cream and jam, and told a few students about the controversy about which should be applied first (see end of "Week Three").  Apparently they were tasty, and I hope that they weren't awfully stale. 

A couple days later, we were on the bus to Sissinghurst, when one of the students thanked me for the treat.  "Those were good!" she said, "What kind of biscuits were they?"  Here we go again... I thought.  So the Tennesseans decided that scones are a type of sweet biscuit, but not all biscuits are scones.  Okay, I can go with that.  Except my fellow intern Daisy explained to me that there can be quite bland or savory.  That confused the issue again. 

And a biscuit... is... a cookie?
As soon as the UT students walked through the entrance to Kew and gathered by Victoria Gate entrance, I informed them that they had arrived just after morning tea.  In celebration of that, they each got to try a chocolate covered Hobnob biscuit.  After all, I'd had cake and cookies at every other morning tea that week.  Why should that day be any different?  

In the UK, "biscuits" may be
dunked in tea or coffee.  This is
coffee -- not tea.  There are just
some things I will not do.
I informed the group that Hobnobs and Digestive biscuits are pretty good on their own, but they're transcendent when dunked in coffee.  Some people I work with dunk them in tea, but as a red-blooded American there are some things I just won't do.  

There were murmurs of enjoyment, then I heard something to the effect of, "These cookies are good!"  No.  Here in the UK, these cookies are biscuits.  Yet they still have "cookies".  So what is a cookie?  There are varying definitions.  One Kew student believes that cookies are soft and biscuits are hard.  Okay, I can accept that.  Another friend of mine said that if they're hard, but still have chocolate chips in them, then they're cookies.  

...

This is all a bit too much for me to wrap my head around, which is why the matter deserved a post unto itself.  I'm opening the discussion up to let the people decide.  What do you think?  What constitutes a scone, biscuit, or cookie?  

If you have any questions, comments or suggestions, please feel welcome to leave a comment or send me an email.

To see more photos from this week, be sure to check out the album "The Great Baked Good Debate" on the Plante on Plants Facebook page.  "Likes", shares and comments are appreciated.

All photos were taken by Amanda Plante at the Royal Botanic Gardens, Kew unless otherwise stated in the caption.

Don't even get me started on crumpets...

Thursday, July 31, 2014

Week Five

Believe it or not, I've already been at Kew for five weeks!  This internship is almost halfway finished.  And yet there are still plenty of new activities to keep busy with.  We were a bit all over the place, with edging and weeding in the order beds, deadheading, weeding, and watering in the secluded garden, weeding in the grass garden, and deadheading the Salvia border, so there isn't one area that really stands out for a profile this week.

The tender, whip-like new growth of Wisteria
needs to be pruned back at this time of year
Although we did work on some routine maintenance, Daisy and I had the opportunity to prune some monstrous Wisteria vines that grow along the brick wall between the order beds and the rock garden.  

Wisteria, way up

Cutting up
According to Crissy, Kew prunes their wisteria vines twice a year.  They do a hard prune in the winter where they cut new growth back to an older branch.  The new growth usually has two or three buds left that will sprout into the vigorous branches when the weather warms up.

Kew also does a softer prune in the middle of summer, which is what Daisy, Beth, Martin, Simon and I were working on this week.  In the summer prune, we remove the fresh, whip-like growth and cut the new vines back to five or six buds (about 15 cm).  This cut improves the appearance of the vine without giving the wall a scalped appearance, improves the chances of a second flush of blooms, and also prevents it from engulfing surrounding plantings.

One vine has already set a new flower bud!
In addition to being very vigorous, the wisteria are also quite old (1966-69201, NOTC).  The one that Simon and I worked on was planted in 1966!  All three of the plants that were being pruned were actually growing over the edge of the brick wall into specimens of other climbers on the opposite side.  There were two ladders available, so we broke into two smaller groups to try to contain the vines. 

Before climbing the ladders, we needed to clear some space.  Also, why use a ladder to cut a section that's within arm's reach?  After we pruned back all the vigorous, whippy new growth that we could reach, it was easier to find a suitable spot to prop the ladder.

Safety first
Martin and I were paired together to ensure
the work done on the ladder was done safely
Health and safety is a huge concern for Kew.  The first hour of the first day of the internship, the internship coordinator walked us through a great deal of health and safety rules, guidelines and forms.  We all needed to sign some additional paperwork before being allowed to use the ladders, and the staff members walked us through how to use the ladders safely.

We made sure that our ladders were securely placed against the wall and the footing was sturdy.  There was always someone with a firm grip on the ladder below to spot the person who was working on the wisteria, and we switched regularly to keep alert.  One hand had to be kept on the ladder at all times, which made pruning a bit more difficult.  Anyway, we finished pruning three vines without any incidents.

A personnel matter

Our leader Shelley was on annual leave for the past two weeks, leaving staff members Crissy and India in charge.  Shelley's management style has always been really open and inclusive, and she is great at communication.  The Friday before she left, she gathered all the staff, students, interns and the apprentice together to make sure we all were on the same page about what needed to be done while she was gone.  However, she's not the type to micromanage from vacation, so there was some flexibility in how India and Crissy chose to execute the work.

Simon shows us the scale of
the wall and how much the new growth
extends into the Salvia border
They did a really great job coordinating everyone -- including the volunteers -- and I think we got everything done.  For instance, right after Shelley left, a "heat wave" hit London.  India and Crissy coped with this by making sure we did work in the sunny, open areas (like the grass garden and order beds) early in the day, and saved chores in the shady areas (like the secluded garden, Salvia border, and birch border) for the afternoon.  You could definitely tell they put thought into how to balance practicality with getting the work done.

Goodbye Simon!

This week was a bit bittersweet for members of our little crew.  Our apprentice Simon is graduating from Kew, and moving on to bigger and better things.  From day one of our internship, Simon has been a friendly and capable presence in the order beds.  He's always been there to help out, whether it's by lending a hand to finish a task or to lighten the mood with a funny story.  It will certainly be weird to go through the next six weeks without him working alongside us.  We wish him the best in finding the job of his dreams.  Good luck Simon!

Familiar Faces for Friday Fun

Friday was a real treat for me, because a group of students from the University of Tennessee plant sciences department stopped by for a tour of Kew.  I took the morning off to wander the grounds with the participants in the Glorious Gardens of England mini-term.  It was so nice to hear a southern twang after five weeks in London!  They were kind enough to let me tag along on some tours of other fabulous gardens in southern England, which is why this week's post is a bit delayed.  I hope that they're having a great time exploring the north this week.

Thanks for reading, and check back to read what happens next week in my internship with Kew.

If you have any questions, comments or suggestions, please feel welcome to leave a comment or send me an email.

To see more photos from this week, be sure to check out the album "Week Five" on the Plante on Plants Facebook page.  "Likes", shares and comments are appreciated. 

This week's British treat are chocolate Hobnob biscuits.  Yummy on their own, and transcendent when dunked in coffee.

Myself and professors Brad Collett and Garry Menendez from the University of Tennessee's Master's in Landscape Architecture and Department of Plant Sciences.  They brought a group of 17 students from various backgrounds to explore Kew and the Glorious Gardens of England.  Glad to catch up with some familiar faces after five weeks abroad!

Saturday, July 19, 2014

Week Four

Kew displays plants taxonomically
by family in the order beds
There's been some interest from readers over the past few weeks in learning more about the weekly edging we do in our area of Kew's hardy display section.  Although I did give a very brief explanation in the first week's post, this week I'm going to give more detail about where we're edging, how this task is done, and my thoughts on this type of work.

This is a great week to write about edging, because we really did quite a lot of it.  Nearly all day Monday was spent edging the order beds and around the water garden, and I know that Simon, an apprentice, went on the edge the secluded garden, grass garden, and around the peony beds.  It's a good thing Simon really enjoys edging!

All about edging in my section

A quick history of the order beds
Kew's order beds (or "plant family" beds) were established under William Hooker's directorship.  Before that time, the space was one of the gardens used to grow produce for the Royal Family.  However, in 1846 a new kitchen garden was planted at Frogmore, and the Royal Family agreed to allow Hooker to use the space for other pursuits.

Lamiaceae, or the mint family, takes up
multiple plots of Kew's order beds
Like many other areas at Kew, the order beds were laid out taxonomically by family.  Originally they were organized by Jussieu's natural classification system (Desmond, 152).  In 1869, the collections were reorganized by the Genera plantarum which was created by, then director, Joseph Hooker and his colleague George Bentham (Desmond, 226, 348). 

Today, the order beds may be in for another reorganization.  Kew's Jodrell laboratory and other prominent botanical and horticultural institutions have been unlocking the secrets of plant's DNA.  Their discoveries have called into question current plant classification systems (Desmond, 318-319).  It looks like genetic fingerprinting will lead the way to new a method of taxonomic organization. 

Although the order beds are a riot of color in the summer, the display is more for education than aesthetics.  Visitors can walk through the garden and compare the similarities and differences between plants within the same family.  For instance, although "Love-in-a-Mist" or Nigella damascena and Anenome both look very different in flower and foliage, they're both in the buttercup family, Ranunculaceae.

Google satellite image of Kew's order
beds.  I figure that we edge
around 6 miles every week!
The order beds are arranged in 104 plots.  Although from within the garden they seem like normal, rectangular plots, they're actually parallelograms that are laid out at a slight angle.  Visitors may be able to note this unique arrangement by standing at one end of the garden and looking down the grass main pathway.  May I suggest a view from the gardener statute looking toward the Jodrell lab?  The mound of the Temple of Aeolus gives another nice view, but it would be best in the winter when the trees between the temple and the order beds are dormant. 

One feature of the order beds that visitors may appreciate but not necessarily notice are the crisp, clean borders between the beds and the grass paths.  This distinction is achieved by edging.

What is edging anyway?
Edging is the process where grass or some other plant is cut at the edge of a garden bed border or path.  There are two motivations for frequent edging.  First of all, it keeps grass from growing into garden beds and onto pathways.  For gardeners in the southeast U.S. who are constantly battling to keep their bermuda (Cynodon dactylon) or Zoysia lawns out of their gardens, you know that once one sprig of grass crosses the border the whole bed is compromised.  Second, crisp, clean edges really do look nice.

Cool tools
Kew's hardy display section generally uses two tools for edging -- edging shears and half-moon edgers.  However, a spade can be a good substitute for a half-moon depending on the type of job.  Edging shears are best for edging along a straight line with an uneven drop.  For instance, we use edging shears to cut along the borders of garden beds and where metal edging meets concrete paths.  Half-moon edgers are used to cut borders that are nearly even, such as along an inlaid brick pathway.

We use edging shears for most
of the edging in the order beds
Before coming to Kew, I was only familiar with the sort of edging we do in Knoxville.  We usually give our borders a fresh edge with a power edger once or twice a year (depending), put down a good layer of mulch, and weed out encroaching grass as necessary. 

Edging the order beds
Every Monday, the whole crew and two volunteers edge all of the order beds and around the rose pergola.  We don't edge around the beds in the northeast quadrant of this area, because they are currently being used as a vegetable garden for a chef's television program.

By my very rough approximations, I figure that every week we edge somewhere in the neighborhood of 10,200 feet.  That's nearly 2 miles!  About 8,700 feet are around the order beds (when you subtract the vegetable quadrant), and the remaining 1,500 feet are the beds around the rose pillars.  Every two or three weeks the crew also edges along the paths within the order beds, which are an additional 1,250 feet.  I didn't calculate the other areas we edge (like the border around the, the peony beds, grass garden, water garden, or secluded garden), but they do take a fair bit of time as well.

India demonstrates how we edge
the order beds every week
The normal Monday routine usually takes seven staff members and two volunteers about three hours to complete.  That's taking into account the fact that the volunteers start a bit later and finish a bit later.  So that's 21 man hours.  Phew!

Visitor reactions
Although I've only been at Kew for a short while, I have noticed some visitor's funny reactions to edging.  The most prominent memory would have to be from a school tour two weeks ago.  A large class of middle-school age students were walking through the order beds when I heard a shrill squeal behind me.  One girl was very distressed by what I was doing to the grass.  She called out to her teacher, "Look at what she's doing!  She's killing that plant!"  It's actually more like giving it a haircut.

One of the other members of our crew noticed that visitors from southeast Asia are especially intrigued by this chore.  I have to say that these visitors do stop and photograph us edging more frequently than those from anywhere else.  Another staff member recalled a time when a visitor from the U.S. stopped her and said, "Now, I know that there is a power tool that does the same thing."

An intern's perspective 
I must admit, there are times (usually right before morning tea on Monday) that I wonder why we do this chore.  I mean, the grass just grows back again, and in seven days it looks like we hadn't even done anything.  But all I need to do is look up from my shears and back to where we've already worked, and I can't help but feel some pride and accomplishment.

The gardens really do look much better afterwards, and as one of the finest botanic gardens in the world, Kew does need to look smart.  I've also got to say that spending some time edging saves lots of time with weeding.  We don't edge regularly in Knoxville, and I know what a pain it is wrestling bermuda grass out of a garden bed.

Aside from edging...

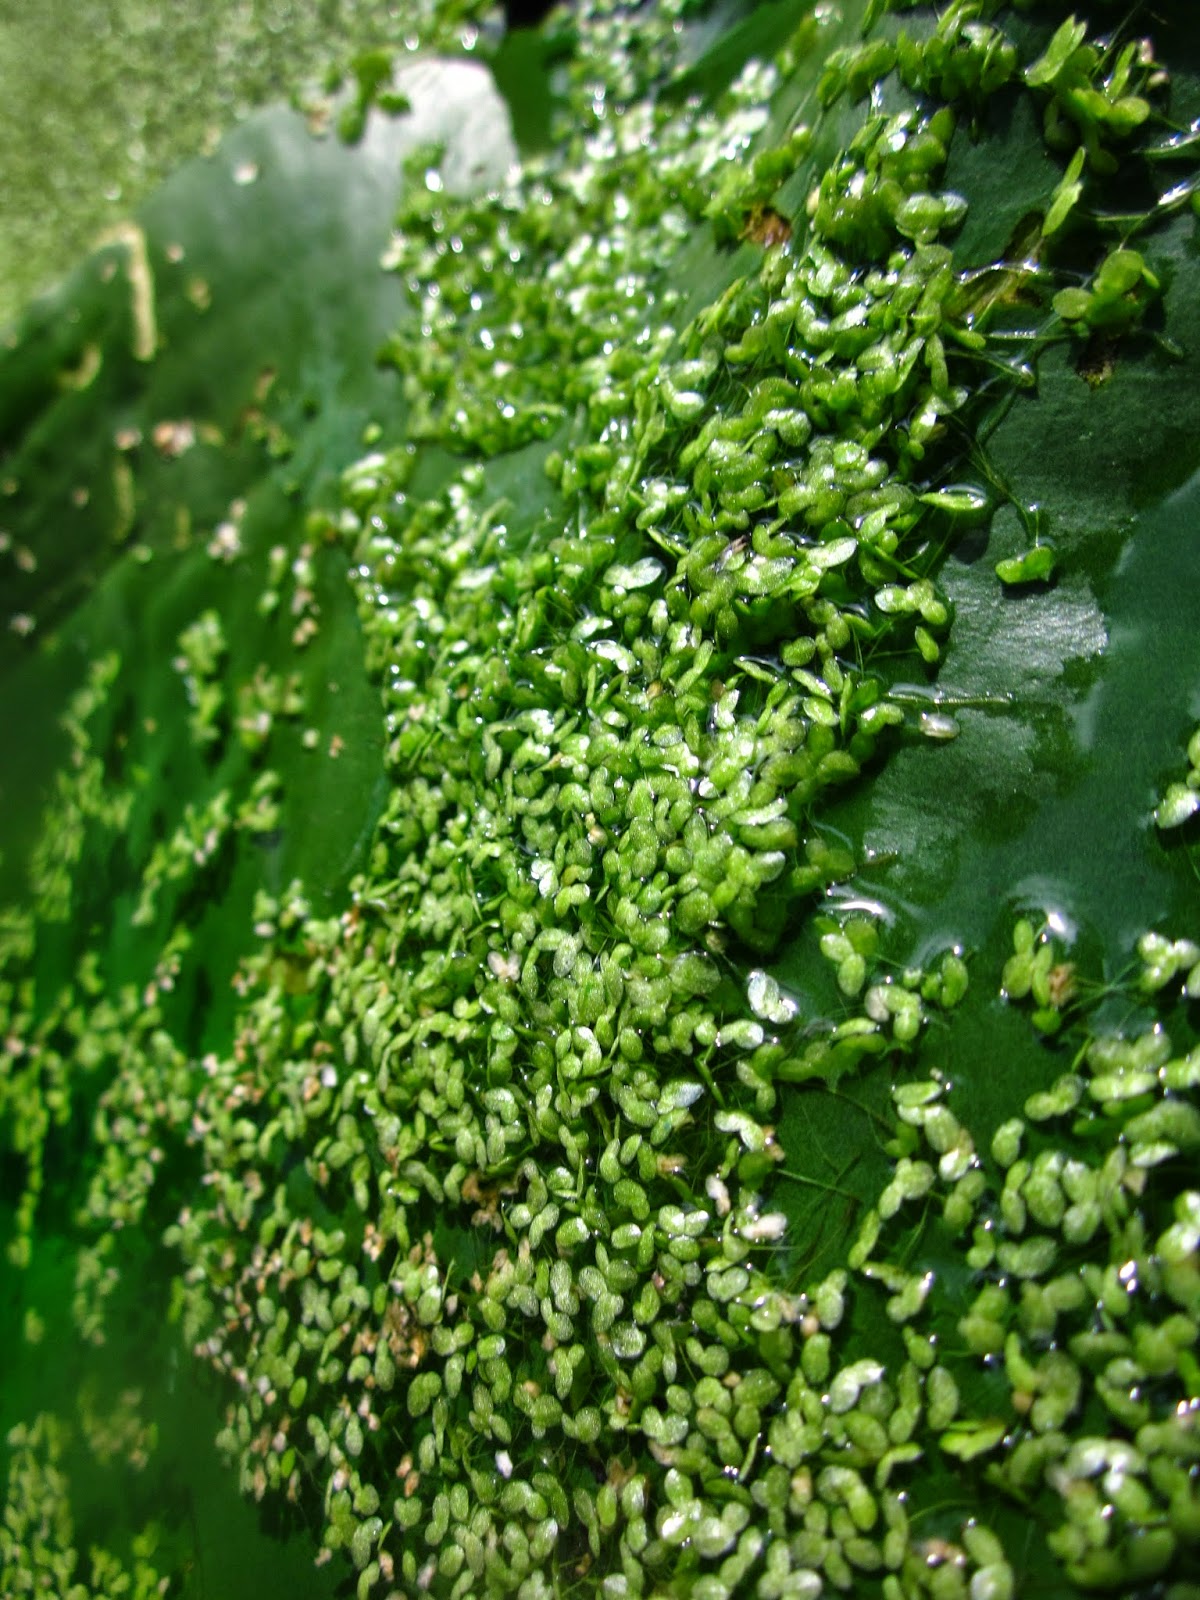
In addition to a whole lot of edging, we also worked in the secluded garden.  The whole crew and a group of four volunteers spent Tuesday weeding, deadheading, watering, edging, and generally doing a thorough job of tidying up.  Chrissy, India, Daisy and I went back to this area on Wednesday, where the team I was in scooped loads of duckweed (Lemna) out of the stream and Daisy's team worked on tidying up the bamboo garden.  We also weeded, watered, and deadheaded the birch border that is next to the grass garden and tidied up roses on the pergola.

Thursday and Friday afternoons we had a special treat.  The artists for Kew the Music did sound checks the last hour or so of work, so I got to hear Elvis Costello warm up with some nice songs and Bjorn Again cover sections of ABBA's "SOS" and "Mamma Mia".  

Thanks for reading, and check back to hear about my second month as an intern at Kew.  Four weeks down, seven weeks to go!

If you have any questions, comments or suggestions, please feel welcome to leave a comment or send me an email.

To see more photos from this week, be sure to check out the album "Week Four" on the Plante on Plants Facebook page.  "Likes", shares and comments are appreciated. 

This week's British treat of the week is treacle tart. Mmm mmm!

 
View of the order beds from the Temple of Aeolus

View of the order beds and the Temple of Aeolus from the School of Horticulture building

All photos were taken by Amanda Plante at the Royal Botanic Gardens, Kew unless otherwise stated in the caption.

Sources:
  • Desmond, Ray.  (2007).  The History of the Royal Botanic Gardens Kew (2nd Edition).  London: Kew Publishing, Royal Botanic Gardens, Kew.  177-179, 345-346.
  • The Plant List website
  • The Royal Botanic Gardens, Kew website and staff


Saturday, July 12, 2014

Week Three

Much of this post will be about Kew's grass garden,
since that is where we spent most of our
time this week.  Photo by Daisy.
You know the routine
 
Although there were a few interesting diversions this week (more on that later), I think Daisy and I have started to settle into our section's normal routine.  Monday was spent edging and weeding the order beds, Tuesday and Wednesday were spent weeding the grass garden, and Thursday was spent deadheading and training at the rose pergola.

Getting to know the grass garden

We did spend two full days and part of one morning working in the grass garden this week, so I figure it's appropriate to go into a bit more depth on that subject. I'll provide a very brief history of the grass garden at Kew, share this week's experience with grass verification, write a bit about the main weed problems, and conclude with what it feels like to weed one of these areas.

A quick history
Ornamental grasses have been cultivated at Kew nearly since its foundation.  The botanic gardens were founded in 1759, and the earliest accounts for a grass garden on the site were in the 1760's (Desmond, 39).  The circular grass beds were not included on a 1763 map of the gardens (Desmond, 56 - 57), so they must have been established later in that decade.

John Smith, Kew's first curator (served 1841 to 1864), seemed to have a special interest in the grass collection.  In 1828, on his own initiative, Smith reorganized and verified the species within the grass garden (Desmond, 127 and 343).  Smith must have researched the history of the garden before this great undertaking, since Ray Desmond cites Smith's 1880 Records of the Royal Botanic Gardens, Kew when pinpointing the date the grass garden was established (Desmond, 39 and 142).

Many visitors still miss the grass garden during
their visits.  In 2006, Kew added a path from the
Princess of Wales Conservatory (structure to the right)
and Cambridge Cottage (not photographed)
to increase traffic through the grass garden.
Smith either installed or updated the beds with the old circular design in mind.  He arranged the grasses in a large bed with four concentric circles and placed the tallest grasses in the center of the beds to create an eye catching display (Desmond, 129 and 148).  The grass garden was located relatively close (slightly northeast) to its present location (Desmond, 150-151, 173 and 336).  Considering the Kew is over 300 acres in size and many of the collections, such as the arboretum, have moved considerable distances over the site during the past 250 years, the movement of the grass collection from the 1820's to today is really not that far.

The grass collection was first moved in 1963, and again in 1982 to the space where it presently resides (Desmond, 354 - 355).  In the 1990's, Kew remodeled and revitalized several garden areas, including the grass the grass garden.  In 1997 circular beds were added, and in 1999 a lawn wheel of British native grasses was installed (Desmond, 310 and 358).  Despite all of the work done in this garden, it was still overlooked by visitors.  That is why in 2006, Kew added a path through the grass garden that would connect the Princess of Wales Conservatory and Cambridge Cottage.  The hope was that this would increase traffic in this area.

Historically, grasses at Kew have been organized in
concentric circles.  In the late 20th century, grasses
were organized in thin, rectangular beds. Between
2007 and 2011, Shelley Cleave's team expanded the
beds to add depth and dimension, as seen above.
According to Shelley Cleave, Kew's main curator of the current grass garden, the new grass collection had been laid out systematically in relatively thin strips, somewhat similar to the order beds.  Although this type of design makes a handy reference garden for botanists and horticulture students, it isn't that aesthetically pleasing for the public. Under Shelley's direction, the beds were expanded in size to add some depth and layers.  Like Smith, Shelley planted larger specimens in the center of the beds and the smallest grasses toward the edges.  This expansion happened between 2007 and 2011. 

Today the grass gardens are a riot of movement, sound, texture and color. The landscape is pleasing, educational, compelling for visitors, and botanists and horticulture students are still able to use this area as a reference garden.

Botanizing
After a certain period of time, Kew's
hort team in the grass garden sends
samples to be verified by the herbarium
Although Friday morning was damp and dreary, we were in for a real treat.  Because many of the specimens in the grass garden had been installed twenty or more years ago, they needed to be verified with Kew's herbarium. Essentially that means that a botanist needs to look at these plants to verify that they are the same as the label and living collection database reflects.  There are far too many plants in the grass garden to verify all at once, so Shelley and the herbarium have been going through the collection alphabetically, a handful of plants at a time.

Friday morning, Shelley showed us the steps on the horticulture side of verifying some grasses.  First, she went on Kew's live collection database and printed off the information for the four plants to be verified.

A wing of Kew's herbarium
Next we went outside to collect materials from each specimen.  If the botanists in the herbarium aren't provided with enough information, they can only partially verify a plant.  That is why Shelley collected the roots, stem, and inflorescence of each species.  If possible, she would include newly opening and fully open flowers and seed heads.

Then, the plant material and an information sheet for each plant was placed in a sealed plastic bag.  Martin, a horticulture student in the group, was charged with delivering the samples to the herbarium.  Really interesting!

Wicked weeds
Weeding the grass garden was much more intensive than it had been the week before.  Last week we were mostly focused on improving curb appeal by removing weeds that were visible to visitors.  This week, Shelley gave Daisy, Simon and me small sections within different beds to weed intensively.  Shelley encouraged us to be very thorough when weeding each section, and I did my best to remove as much of each weed as possible.

View within the grass garden prior to weeding
The two main problems -- couch grass (Elymus repens) and wild garlic (Allium ursinum) -- need to be completely and carefully removed.  If even the smallest stolon, rhizome or bulblet remain in the soil, then the weed problem will persist.  If these weeds are pulled normally without consideration for the pieces that are left behind, then there may be a dozen or so that sprout from what that one weed left in the soil.

The grass garden is pretty large, and the mulch isn't as thick as it is in the order beds, which makes it more difficult to completely remove entire weeds.  Add into the mix the fact that we're supposed to make every effort to preserve that thin layer of mulch without exposing any soil, and you can see why this took all day Tuesday and Wednesday to do.

An intern's perspective from within
View within the grass garden after weeding
Weeding the grass garden is a lot like swimming in a deep pool.  You can't just walk in -- you have to dive in with your arms out in front to protect your face from grasping, razor sharp foliage.  You can't wade through the sections of the bed.  Rather, you must stroke ahead to make way and kick legs to prevent trampling or tripping.

Weeding on your hands and knees is like swimming under waves of Miscanthus.  You pray the wind doesn't rise lest you become tossed under the whipping fronds.  On the freshly weeded, brown, soft mulch floor, the temptation to lay down gets stronger as the work drags on.  Thankfully, Simon throws a life saver ("Tea time!") long before there is any danger of drowning in the grassy sea.

Staff Picnic

Tuesday afternoon was a real treat -- Kew had a staff cookout!  Although I hadn't really met anyone (besides interns) in the horticulture department outside my section, I was able to get an idea of how many horticulturalists there are at Kew in last week's meeting.  The barbeque on Tuesday was even more boggling because it included all the people who make the gardens run -- not just horticulture staff.  It's really amazing just how many people actually work at Kew.

There wasn't as much mingling between departments as one might expect, but there was a little.  The hort people tended to stick together, the Joddrell folks were in another group, etc.  One employee in the foundation did something really brilliant to get the horticulture people talking and comfortable -- she asked a plant question.  Simple, but effective.

She described a plant she had noticed ("It's like a stick with a hard raspberry on it").  There was silence at first, then one person asked for more information. ("It didn't have any leaves or flowers at the time").  A low murmuring started, and then the questions started flowing ("There was no label."  "It was near the Director's garden." "I saw it last week.").  Other horticulturalists who work in the area were tracked down.  Apparently one person walked back there to try to find exactly what she was talking about.  The next morning at work before the Hardy Display section meeting, everyone was all atwitter.  One person had even dreamed about the plant, and woke up in the middle of the night knowing exactly what it was.

Genius.  I need to keep that in my pocket as an ice breaker at the next horticulture conference I attend.

The British treat of the week is scone with clotted cream and jam (or jam and clotted cream).  Sooo decadent. 


The procedure for applying spreads to the scone differ depending on where you are in the United Kingdom.  In some regions, the jam must be spread before the cream, whereas others are vice-versa.  I tried both, and they're both really rich and delicious.  Here's my two cents.  If you want your scone to absorb some flavor from the jam, apply the jam before the clotted cream.  If you don't want a soggy scone, then apply the clotted cream before the jam.  However you choose to prepare this tasty treat, plan on taking a nice, leisurely stroll afterwards to ease your guilt after having such a heavy dessert.

Enjoying a decadent scone with clotted cream and jam at Kew's cafe by the Victoria Gate

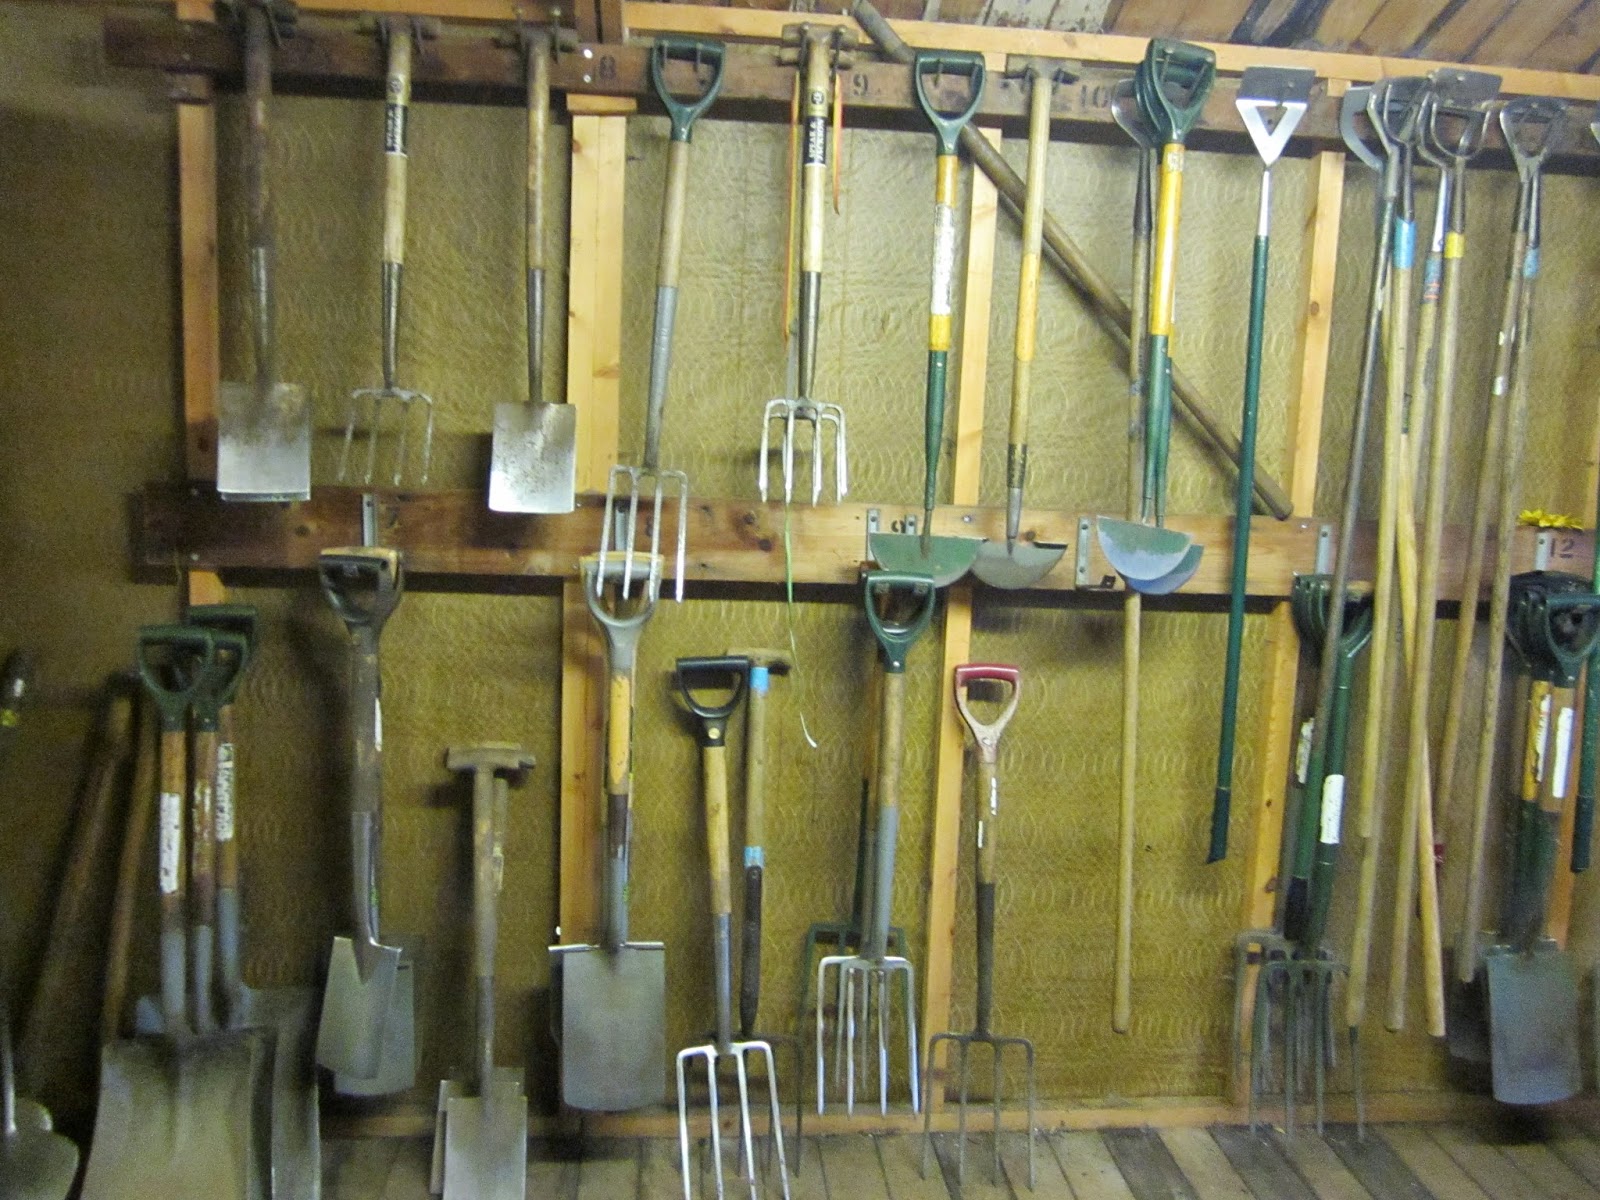
As promised, here are a couple photos of Kew's water boxes and my section's tool shed.  More photos can be viewed in the "Week Three" photo album on my facebook page.

As per one reader's request, here are some photos of our section's tool shed.  Every tool is clean and in its place.  The floors are also clean.  Absolutely the tidiest tool shed I've ever set foot in.  And it is ALWAYS this clean.
As per one reader's request, here are some photos of Kew's irrigation system.  The system is very old, and it can be difficult to replace broken parts.  Water box in the Queen's Garden.  This is absolutely not the state that most boxes are in. I just couldn't get the water boxes in the order beds open for a photo.

If you have any questions, comments or suggestions, please feel welcome to leave a comment or send me an email.

To see more photos from this week, be sure to check out the album "Week Three" on the Plante on Plants Facebook page.  "Likes", shares and comments are appreciated.

All photos were taken by Amanda Plante at the Royal Botanic Gardens, Kew unless otherwise stated in the caption.


Sources:

Friday, July 4, 2014

Week Two

The Royal Palace at Kew, where royalty,
including King George III would spend family time.
Happy U.S. Independence Day from across the Atlantic!  It is so weird to be in England on the Fourth of July, working at a garden where George III actually spent quite some time.  I read something in Ray Desmond's The History of the Royal Botanic Gardens Kew that around the same time as the Revolutionary War was going on, King George was actually buying up some of the property surrounding Kew at that time to increase the size of the estate.  Interesting stuff.

This week was as exciting, new, and varied as the first, but this post won't be nearly as long as last week's post.

Secluded Garden


The slate fountain in the Secluded
Garden makes a really lovely sound,
but it gets really gross with algae
The whole team spent the first part of Monday straightening up the secluded garden.  This area of Kew is designed to attract most of the senses, including sight, sound, and smell.  The director was planning an event in the area for that afternoon, so it had to be tidied in the morning.  We were mostly weeding and deadheading, although we did a bit of planting too.

Shelley asked me to clean algae out of the slate fountain towards the end of the morning.  Martin told me to use a garden rake to scoop the algae out, "It's like scooping spaghetti out of a pot."  It really was.  I think it will be a while before I can eat spaghetti again though.  There was a bit of algae growing on the fountain as well, so I had to pick it out.  It's difficult because the algae gets into the grooves between the pieces of slate, but I think I got nearly all of it.

Order Beds

Mondays mean edging in Kew's order beds.  The whole team and two volunteers got together to edge all of the order beds and the pillars in the rose pergola.  I think I'm starting to get the hang of edging.  My cuts were much cleaner, and I got done a bit quicker than last week.  We finished around afternoon tea, then spent the rest of the day weeding and deadheading.

I think Daisy made this really nice border fence.
The fences are made of Hammamelis branches, and
hold floppy plants out of the mown paths.
On Wednesday morning Chrissy, one of Kew's horticulture students, taught Daisy and I how to build branch fences to hold up plants that were flopping into the pathways.  Shelley wanted us to prop everything out of the paths and off of the grass because the team would be mowing the next day.  I had never built anything quite like these fences, and it was really interesting to learn.  I hope to write a Thrifty Gardener post about it in the future with more details so readers can learn how to build one in their own garden.

Essentially, we were given a bundle of Hammamelis branches, and we bent them into small or large structures to support leaning plants in an attractive way.  Although I really enjoyed this task, I'm not very good at it yet.  I needed a lot of guidance from Chrissy, and it took me much longer to finish mine.  I think Daisy averaged about five fences for every one that I built.  I'm sure I'll do better next time.

Grass Garden

Couch grass (Elymus repens) is a really
troublesome weed in Kew's Grass Garden
The BBC planned to do some filming in the grass garden on Thursday, so we spent Tuesday weeding.  Shelley suggested we wear long sleeved shirts, because the grasses are very sharp.  Chrissy and India were telling us that often the scratches won't actually appear on the skin until later on.  They've left work before with healthy looking skin, but when they got home before their arms would be totally scratched.

Shelley paired interns with students so we would have guidance nearby.  I was paired with Martin, and even then it could be an ordeal struggling through the grasping foliage to ask him a question.  We worked on two beds which are primarily Miscanthus -- a sharp and vicious grass.

The main weed problem in the grass garden is also a grass -- Elymus repens or couch grass.  Any gardener will tell you that weeding in and of itself is quite a chore.  Distinguishing one sprig of couch grass poking out of a giant tuft of Miscanthus and finding a way to get it out is another thing altogether.  We worked in the garden the entire day, and just nearly almost finished by 4:00 p.m. 

Water Garden

Duckweed  (Lemna minuta) is needs
to be scooped out of the Water
Garden fairly regularly
This task was the most fun so far.  Daisy, Simon and I put on waders and went into the water garden to scoop out blanket weed (algae) and duckweed (Lemna minuta).  There are old pipes to watch out for on the floor.  In the past, the water had been heated by these pipes below the surface.  Although they're not in use now, they're historic and, well, there already, so staff just need to watch their step when in the water.

If you look close, the water in the garden is actually dyed blue.  Shelley said that makes the environment below the surface much darker, and that makes it more difficult for algae to thrive.  It was certainly working in the center pond, but the border ponds still had a lot of green floating on the surface.

Staff Meeting

I'm really fortunate to be an intern at Kew during what may prove to be a pivotal time in their history.  The top three things that could be said to affect Kew right now would be 1) The gardens are guided by a relatively new director, 2) There have been cuts in funding, 3) The organization is being restructured.  Thursday's meeting was about the restructuring.  I won't go into the details, but this was a really interesting meeting.  The staff in attendance nearly filled the Jodrell Auditorium.  I was sitting with some familiar faces from my section, but I had never met most of the staff, even in passing.  The interns were really fortunate to be present and get a glimpse of what's next on the horizon at Kew.

Friday Afternoon

The Rock Garden and Alpine House
Just now, all of the interns got together for a tour of the rock garden, alpine house, and alpine nursery areas.  Although I'd walked through the rock garden a few times, the tour was packed with loads of information I would have never have gotten on my own.  For instance, Kew cultivates several species that are endangered or even extinct in their natural habitats.  The affected countries have been able to get that plant material back, that would have otherwise been lost forever, to reintroduce to the environment.  Really exciting stuff!

Thanks for reading, and check back to hear about my third week as an intern at Kew.

If you have any questions, comments or suggestions, please feel welcome to leave a comment or send me an email.

To see more photos from this week, be sure to check out the album "Week Two" on the Plante on Plants Facebook page.  "Likes", shares and comments are appreciated. 

This week's British treat of the week is steak and ale pie. Tasty!


Cleaning the Water Garden Friday afternoon.  Daisy and I are fortunate to be the only interns paired in the same area.  Photo taken by Simon.  Thanks Simon!
All photos were taken by Amanda Plante at the Royal Botanic Gardens, Kew unless otherwise stated in the caption.

Sources:
  • Desmond, Ray.  (2007).  The History of the Royal Botanic Gardens Kew (2nd Edition).  London: Kew Publishing, Royal Botanic Gardens, Kew.  177-179, 345-346.
  • The Plant List website
  • The Royal Botanic Gardens, Kew website and staff

Sunday, June 29, 2014

Week One

Hello, I'm Amanda, and I'm new at Kew.  To learn more about me and this internship, please refer to the introductory post.  Typically I'll use this space to detail what I learned and accomplished in the garden this week.  This week's post is a much, much longer than I expect future posts will be, because it was the first week and everything is all just so new and interesting.  I'll start at the beginning of the week.

Orientation

The historic School of Horticulture building,
beyond the water garden

I arrived an hour and a half early for orientation.  I puttered around Kew Green until just after 8 a.m., School of Horticulture building, still an hour early.  The interns chatted and got to know each-other for a bit before orientation began.  For most of the interns, English was not their first language.  I was the only student from the United States.
then made my way to the

Kate Dixon gave us some information about health and safety, interacting with visitors, and general expectations.  We went to the constabulary building to get access cards and bike permits.  In many gardens that I've been to, staff either walk or ride a utility vehicle.  At Kew, workers are actually able to bike across the grounds, so they don't spend most of their time walking to and from the kitchen during lunch and tea breaks.  After all, the garden is over 300 acres.

Hardy Display Section

After orientation, each of the interns went to the sections they would be working in.  Daisy, an intern from the UK, and I went to meet with our team leader Shelley Cleave.  Shelley introduced us to the other workers, Martin who is one of Kew's horticulture students, and Simon who is an apprentice.  The next day we would meet India, who is another staff member.

Plants are arranged in Kew's order beds taxonomically
by family name, genus, and even species.  These beds
feature both annual and perennial plants.
Although Shelley was often present to provide information and guidance, she allowed the students to get leadership experience as well.  Although we all spoke English, sometimes I did have difficulty completely understanding everything.  Everyone was very accommodating and patient.  It was especially helpful that Daisy could help decipher some things too.  I needed to be careful that everyone could completely understand me when I spoke as well, so as to avoid confusion.

It was especially interesting that the staff have set times for "tea".  Essentially they're breaks, but many workers do drink tea at tea time.  Workers gather near the kitchen and lockers to sip tea or "a coffee" (not just "coffee") and talk about what they were working on, any interesting horticultural goings-on, and life in general.  Conversations were more often than not about plants.

Daisy and I were really fortunate to be given a diversity of tasks to work on during our first week.  We completed a variety of chores in every part of the areas we were assigned.  These tasks are described by area in the following sections below.  I have to admit, I was relieved that we weren't just weeding one spot for five days.  Maybe there will be a week like that at some point, but I'm glad the first week went the way that it did.

Order Beds

Edging
We maintain a definite border around
the order beds by edging
When Shelley told us that we'd be edging the order beds, I thought that we'd be using a power edger like I'd seen used at the UT Gardens.  I was a bit nervous about being trusted with that type of equipment right of the bat.  Luckily, I was wrong.  Daisy and I used a tool that I was not familiar with, but were also called edgers.  They were like long-handled shears, where the blades were held at an angle.  According to Daisy, many people use them to keep grass from growing into their garden beds at home. 

Martin explained that you should feel the back blade of the edgers laying against the thatch edge of the grass.  Cutting should be easy -- if you feel like you're forcing the blade, you're probably not going with the contour of the border.  I struggled with this at first, but like any repetitive task, you get used to it.

A clean cut edge in the order beds
Edging can be a bit tricky though.  For instance, you may not realize that you've cut too high until cleaning up the edges afterwards.  Simon pointed out that we should avoid cutting down on pieces of mulch or rocks, because this will dull or even break the shears.  Probably the most tedious part of edging is cleaning up all the little grass clippings afterwards.  This wasn't necessary in the order beds because it is such a large area, but we did clean up clippings after edging the rose pergola beds and the grass garden.

Finishing edging doesn't necessarily mean you're done with the task. First, we set aside all the dull tools.  When it's a rainy day, the workers will sharpen all dull tools.  Next, we sprayed a soapy water mixture on the blades.  Then we dried the blades completely so they wouldn't rust.  After that, we added some grease to make sure the two blades stayed lubricated.  Then we put the edgers away in their designated spot in the shed.  It's worth mentioning here that the hardy display tool shed is the cleanest garden shed I've ever seen in my life.

So why bother?  Who cares if the beds are a little scruffy around the edges?  Scruffy beds are less visually appealing than a nice, neat bed.  Also, edging prevents grass from the lawn from spreading into the beds, creating a weed problem down the line.  Finally, regularly edging maintains the original straight edge, preventing the need to re-do the edge with a power edger annually.

Weeding
Maintaining a clean, weed-free bed is essential for any garden.  Weeds compete with planted material for resources like sun, water, and nutrients.  Weeds can also be vectors for pests and diseases that may infest the other plants in the bed.

When working in any unfamiliar garden, I can be a bit nervous about weeding for the first time.  What if I remove something wrong?  What if I leave the wrong thing behind.  The order beds are arranged taxonomically by plant family, which makes weed identification a bit easier than in traditional garden beds.  For instance, if you're weeding the Rosaceae beds and there's a Leguminaceae growing in the bed, chances are that plant is a weed.  Also, many of the weeds that are a problem for Kew are also a problem in Knoxville, Tennessee.

While most weeds can be tossed in the green waste bin for composting, there are some noxious weeds that should only be destroyed by fire.  These are weeds that, if composted, are likely to survive Kew's composting process and spread throughout the garden when the compost is used.  Weeds like Oxalis and bindweed (either Calystegia sepium or Convolvulus arvensis) need to be incinerated rather than composted.

Planting
Daisy and I had the opportunity to plant a few times this week.  We started by planting some small pots of the herb Rue, also known as Ruta graveolens (1969-50371), among larger bushes in the order beds.  When the older plants are ready to be removed, the specimens that we planted will be large enough to fill in.  That way removing the older plants won't leave an unsightly gap in the bed.


We also planted Dahlia 'David Howard' (2009-440, BUCO) in patches in the long bed that runs along
Aeonium arboreum 'Atropurpureum' is actually
planted with its pot still in the ground for ease
of removal at the end of the growing season
the brick wall and Aeonium arboreum 'Atropurpureum' (1994-2986).  I liked India's description of the Aeonium as, "A Dr. Seuss looking plant."  It has a long stem and succulent, black foliage.  The plants are propagated from last year's specimens in a glass house during the winter.  Then they are planted in the order beds and grown through the summer.  Before the first frost, the plants are removed, new cuttings are taken for next year, and the remains are composted.  This particular type of plant is still contained within the pot when planted.  The pot is firmed in, and the plant is buried another inch or so to make sure the wind doesn't knock it over.  This process makes it easier to remove the plants later in the year, rather than having to dig up all the roots.

When planting, we had to be careful to scrape all the mulch to one side before breaking ground.  This way, once the plant is installed, one only has to push the mulch back into place rather than mulching again or leaving a mixture of soil and mulch.  We did have to be careful not to push the mulch up against the stem, because the mulch can get hot enough to damage the plant.

Watering
Although Daisy did some watering with a hose in the Salvia border, I just lugged around cans to water in everything that we had planted. I filled up at a nearby water box that is level with the turf.  Although a sunken water box system is more attractive and out of the way than a traditional tap, they can be a safety concern for visitors.  We had to make sure the lid covered the hole so that visitors wouldn't trip or fall in.  Shelley informed us that Kew's water box system is actually quite old.  So old, in fact, that if anything breaks, it is very difficult for them to find replacement parts.

Rose Pergola

Mowing
Most visitors who meander through the rose pergola are looking up at the beautiful, fragrant blossoms.  However, if you look down, you will notice three things.  First, there is metal edging between the grass lawn and the concrete path.  Second, you will notice a square bed around each rose.  This prevents turf and weeds from competing with the roses for resources.  Third, you will notice a narrow strip of grass between the edge of the rose bed and the path that has the metal border.  This grass must be mowed, but it is too narrow for the mower that is used on the rest of the turf.  It would also be dangerous to use a traditional mower above the metal edging.

The recently mown pillar around Rosa
'Kew Rambler' (2012-363, BERO)
Kew maintains this grass with an old fashioned cylinder push mower.  I have never used one of these before, and I was excited to have the opportunity.  Daisy and I took turns mowing around each rose.  She mowed one side of the pergola, and I mowed the other side.  We simply mowed around the edges of each bed.  We would mow short, brisk movements clockwise around the bed, then counterclockwise to ensure all the grass was cut.  Even at the highest setting, the cylinder mower cuts grass a bit shorter than the rest of the lawn, so if you look close you may be able to see the line.  When we finished, Shelley showed us how to clean the blades with a water hose.

After this experience, I would absolutely recommend a cylinder push mower for anyone who has a small lawn.  The one at Kew was made of really lightweight plastic, so it was easy to push.  The bag was easy to remove and replace when emptying clippings.  My only complaint would be that the mower always seems to cut the grass, so when moving between pedestals or returning to the shed, one must make sure that the front wheels don't come in contact with the lawn or you'll leave a trail of slightly shorter grass behind you.

Training
The climbing roses had been growing vigorously this season, and some vines were hanging into the pathway and surrounding turf.  Shelley and India told us that visitor safety was our first concern, and that we needed to tie back dangerous branches so that nobody would walk into a limb and get caught or scratched.  However, it wasn't as simple as just tying branches with twine.

Trained vines of Rosa 'Treasure Trove' (1995-97,
RODA) around a pillar of  the rose pergola. 
Note how the older growth is vertical, while
the young growth is wrapped around the pillar.
Up until relatively recently, the roses on the pergola had been trained to grow straight up their pillars.  As a result, most of the new, vigorous growth was up on top of the pergola rather than around and on top of the pillars.  Kew addressed this problem by training the vines to wrap around the pillars.  Vines on one side of the path are trained to grow clockwise around their pillars, and the vines on the other side grow counter clockwise.  This practice increases the amount of stem within the sight of the visitors.  Flower buds and new growth come out of nodes on the stem, so this improves the view from within the pergola to include many more flowers.

Typically, the hardy display team trains their climbing roses around October.  However, at that time of year many of the stems may be woody and break.  Right now, the stems are green and pliable.  This is why Daisy and I were instructed to tie back vines so they would grow in the right direction, and would be easier to manipulate by the team later in the year.

Although it was tough to get the knack of things at first, this was a relatively easy (although very prickly) chore once we got the hang of it.  Daisy and I found that it was easy to get totally consumed in what we were doing.  It was like trying to solve a puzzle.  This task easily took most of our work hours this week to complete.  Some of the earlier pillars look a little scruffy, but Shelley thinks that the next time she has us train roses we'll do a lot better.

Pruning and Deadheading
Once the pillars were mowed and the vines were trained, Shelley set us out to collect the three D's of rose maintenance, which are any parts of the plants that are dead, damaged, or diseased. There weren't many dead or damaged vines, but there was quite a lot of deadheading to do.  That is, removing the dead flowers so that the plant will put more energy into another wave of blooms rather than forming fruit (rose hips) and setting seeds.  Deadheading also beautifies the rose pergola by removing all the brown, so that visitors only see vigorous green and pink or white blooms.

The rose pergola Tuesday morning.  We "finished"
on the pergola by the end of the day Thursday.
Most of the roses were relatively disease free by Knoxville standards, especially considering the fact that Kew doesn't spray the roses on the pergola.  Sure, there was an occasional touch of black spot or a smidgen of powdery mildew, but for the most part the most diseased plants were leaps and bounds healthier than the healthiest (untreated) roses back home.  There were a couple exceptions that looked especially rough.  Daisy and I noticed that the two most sickly vines were near each-other on the path and much newer than the other climbers.  We wondered if perhaps there was something with the environment rather than the plants themselves that was causing the problem, but I completely forgot to ask anyone.

Grass Garden

Edging
'A Sower' in Kew's grass garden
First thing on Friday morning, Shelley, India, Martin, Simon, Daisy and I went to the grass garden to edge the beds.  This would have taken ages for one person to complete, but with everyone working together we were done by morning tea.  This reminded me of what Wendy from "Every Child Outdoors" in Knoxville used to say, "Many hands make light work."  I've always preferred to work alone or in small groups, but this was definitely a situation where I was glad there were many hands.

I was still quite a bit slower than the others, but I did work a lot faster and better (I think) than when we had been edging the order beds on Monday.  I could have gone faster, but I didn't want to be sloppy or make a mistake.  Hopefully I'll catch up soon.

Weeding
When we finished edging, we worked on weeding around the cereal crops.  This was somewhat trickier than weeding in the order beds, because many of these weeds were seedlings from the cereals that had been grown there the year before.  Usually the weeds didn't look too similar to the cereals.  The weeds were also usually smaller than the desirable plants and were growing out of the planting pattern. There were one or two instances where it was a bit tricky, but we managed to make it through without pulling any of the wrong plants.

Friday Afternoon

After lunch on Friday, the interns got together to learn how to use the library, do a quick tour of a portion of the garden, and learn how to use the computer system.  The library was amazing.  I think I will be spending a lot of time there outside of work.  There were so many books, and they were all about horticulture.  Some of the books are incredibly old.  Rare and historic collections are stored in a separate area that we didn't go to.  The temperature is maintained at a certain level to make the environment less hospitable to pests and to prevent decay.

The relatively newly planted Queen's Garden
Kate took the scenic route back to the School of Horticulture.  We saw Kew Palace, where King George III stayed with his wife during his bouts of "madness".  Outside the palace was the newly planted Queen's Garden.  I would have never guessed that most of the plants had only been in the ground for a few months.  Kate told us that before this year's growing season, all the old soil had been removed and replaced with fresh soil.  Herbs and flowers (historically for "posies") were started in the greenhouses (or as they say at Kew, "glasshouses") so they would be large and vigorous when planted.  Essentially, this area gives the illusion of being a very old garden.  Although the space and design is old, the garden itself is young.

Back at the school, Kate made sure that our computer logins were working, and that Kew's living collections database was available on our desktops.  This program will be really helpful for our Plant of the Week assignments.  If you enter an accession number, genus, area of the garden, or collector's name, the information for that specific plant is pulled up.  You can even search for dead specimens and read what went wrong (i.e. Was it stolen? Diseased? etc.).  Really neat stuff.

After that, I had an hour to explore the gardens and decide on what plant I would profile this week.  I hoped to spotlight plants from each area of the garden or that had historical significance rather than focus on only plants from my area.  However, I still hadn't made it beyond the Alpine House.  I really didn't wander all that far before selecting a plant and interviewing some staff.  The size of this garden is so daunting that I'm glad we have three months to explore it.  If given a day, I don't think that I'd really see much.

Thanks for reading!  Check back in seven days to read about my second week at Kew.

To see more photos from this week, be sure to check out the album "Week One" on the Plante on Plants Facebook page.  "Likes", shares and comments are appreciated.

If you have any questions, comments or suggestions, please feel welcome to leave a comment or send me an email.

Order beds are in the foreground, rose pergola to the right, and the Temple of Aeolus in the trees behind.
All photos were taken by Amanda Plante at the Royal Botanic Gardens, Kew unless otherwise stated in the caption.

Sources:

Amanda's British treat of this week is chocolate Digestives biscuits.  Yum!